
NSX-T Manager Deployment
- khushnood khan

- Nov 14, 2021
- 2 min read
We will discuss here NSX-T Deploymen here.
We have NSX-T Manager version as "3.1.3.1.0 build 18504672" .
vcenter version: 7.0.2 Build:17958471
Esxi version: 7.0.2, 17867351
We will deploy the ova in the management cluster of the vcenter.
1) Below is the ova I have downloaded from the vmware dowload.
ova file

vmware download page.

2) Right click on the host and click on deploy ovf template option.

3)Choose local file option under Select OVF template .


4)give the name of the vm and select the folder location.

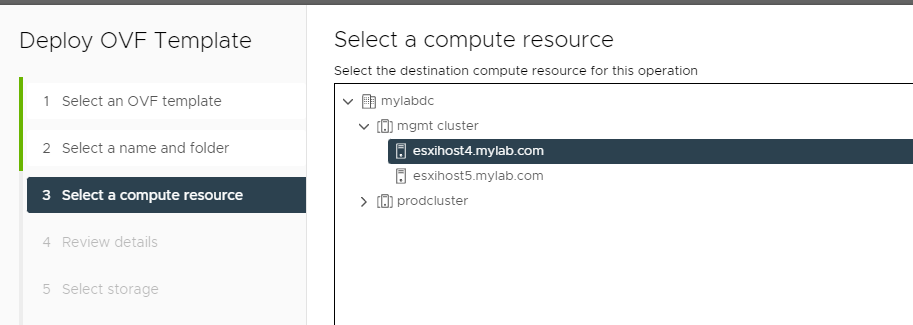
5) select the compute resource.
6) Check the review details and click next.

7) For a lab environment I would choose small here.

8) I have chosen the disk format as thin provisioned and selected the datastore.

9)Choose the network for the appliance.

10) Give the root admin and audit password
also set the hostname ip address and dns setting as shown below.


11) On the final page review check every and click finish.

12) we can see the progress of the deployment.

13)Now the manger is successfully deployed.

14)Login to the nsx manager now.
and accept the EULA

Once the deployment is done then the configuration is required of nsx-t manager
1) We can see the 1st page after login.
We can see under overview in inventory there are 0 vms configured.
we can also see the networking services are not there.
Also under system we can see 1 NSX manager node and recommendation is 3 nodes.
as this is our lab environment we will stick with one here under production we will configure 3 nodes.

2) The next thing we would do is add the compute manager and licenses.
lets add the compute manager(vcenter server)
on the NSX-T management page click on system as shown below.

3) Click on fabric and click on compute manager as shown below.

4) click on add compute manager and fill the details.

5)click on add option for the thumbprint.

6) We can see compute manager added here.

7)now the license has to be added.
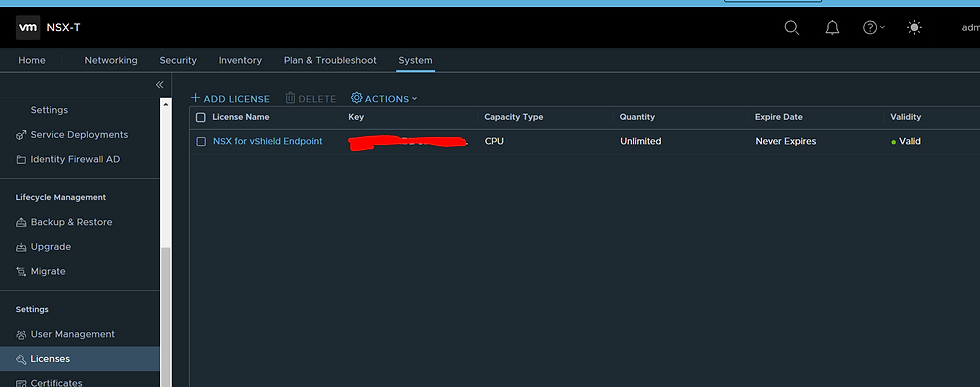
8) Click on add license and enter the license key.

9)We can see the license added now.

In the next post we will see some more configuration for NSX-T

Comments