VMware vSAN file services
- khushnood khan

- Aug 14, 2021
- 2 min read
1)Enabling file services
Go to Cluster>vSAN > Services

2) Click on enable under file services.

3) Click next and On the next window we can see the have to select the file service agent.
we can select it manually or through internet.
if you don't have inter net then select it manually.
now the question is where to download the ovf from.
I have downloaded the jason file from below link.
and then from the notepad link downloaded the below selected files.

From the link we have to download other 5 files as shown selected below.
use the link like "https://download3.vmware.com/software/VSANOVF/< enter the file name>"


4)Once the files are uploaded the fill the details for the file service.

5) Select the network as hhown below and Add the subnet mask and gateway.

6) Make sure the DNS entry for the server are already in the dns server.
add the ips and dns name of the file servers

7) Once done click on finish.

8) We can see the file service enabled and details in configuration of the cluster under vsan services.

Now the file service has been enabled we would add the fileshare to it.
we will be adding 2 file shares here smb and nfs.

9) We would start with SMB share.
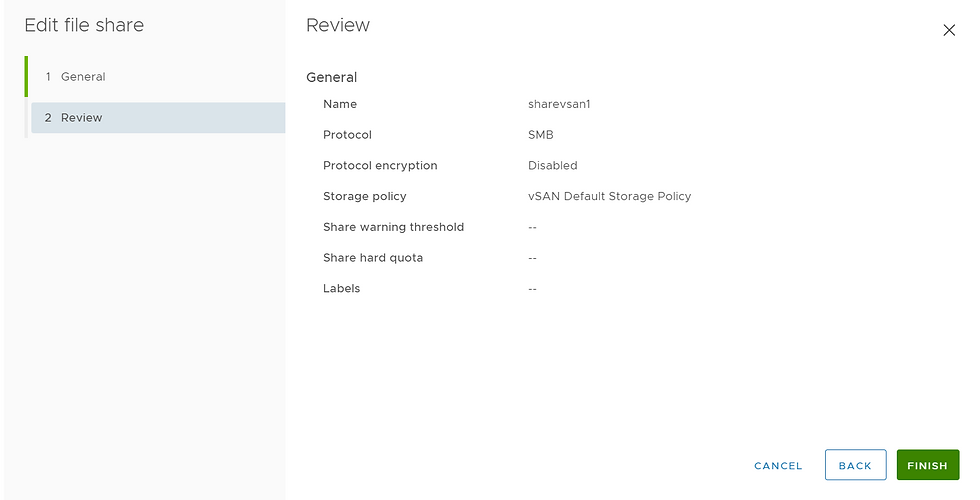
we would give the name and select the protocol as smb.
we can choose the storage space quotas(i have not selectes any option here) and click next.

once done review the setting and click next.

10) Next is NFS share
Type the nfs name and select the protocol.
we can choose the storage space quotas(i have not selectes any option here) and click next.

On the net access control select customize net access and type ip set/subnet and click next.

once done review the setting and click on finish.

12) Once done we can see the shares on the file share tab under configuration and vsan.


Comments